For those running elearning courses with minimal interaction Moodle can be a large cost and cumbersome way to manage say the download of files for students to use and learn from. CourseSales.com offers two methods that cost nothing more than the effort to set up the method to deliver the learning to students. The two methods are emailing content and using the student portal. Both methods can be used for pure elearning environments and blended learning that have a portion of e-learning integrated with face to face training.
Working with learning content
Email content to students
Using the email template system and process steps content can be delivered to students as they complete assignments, quizzes or following registration.
Use the student portal to deliver content
This uses the password set by the student at registration to provide the student with content specific to the courses they are enrolled in. This method means you can deliver content on a per topic or per course basis, the content can include:
-
Embedded videos (see below)
-
Embedded flash files (which includes more interactive learning)
-
Images and text content (see below).
The following example shows delivery of content to students using the portal:
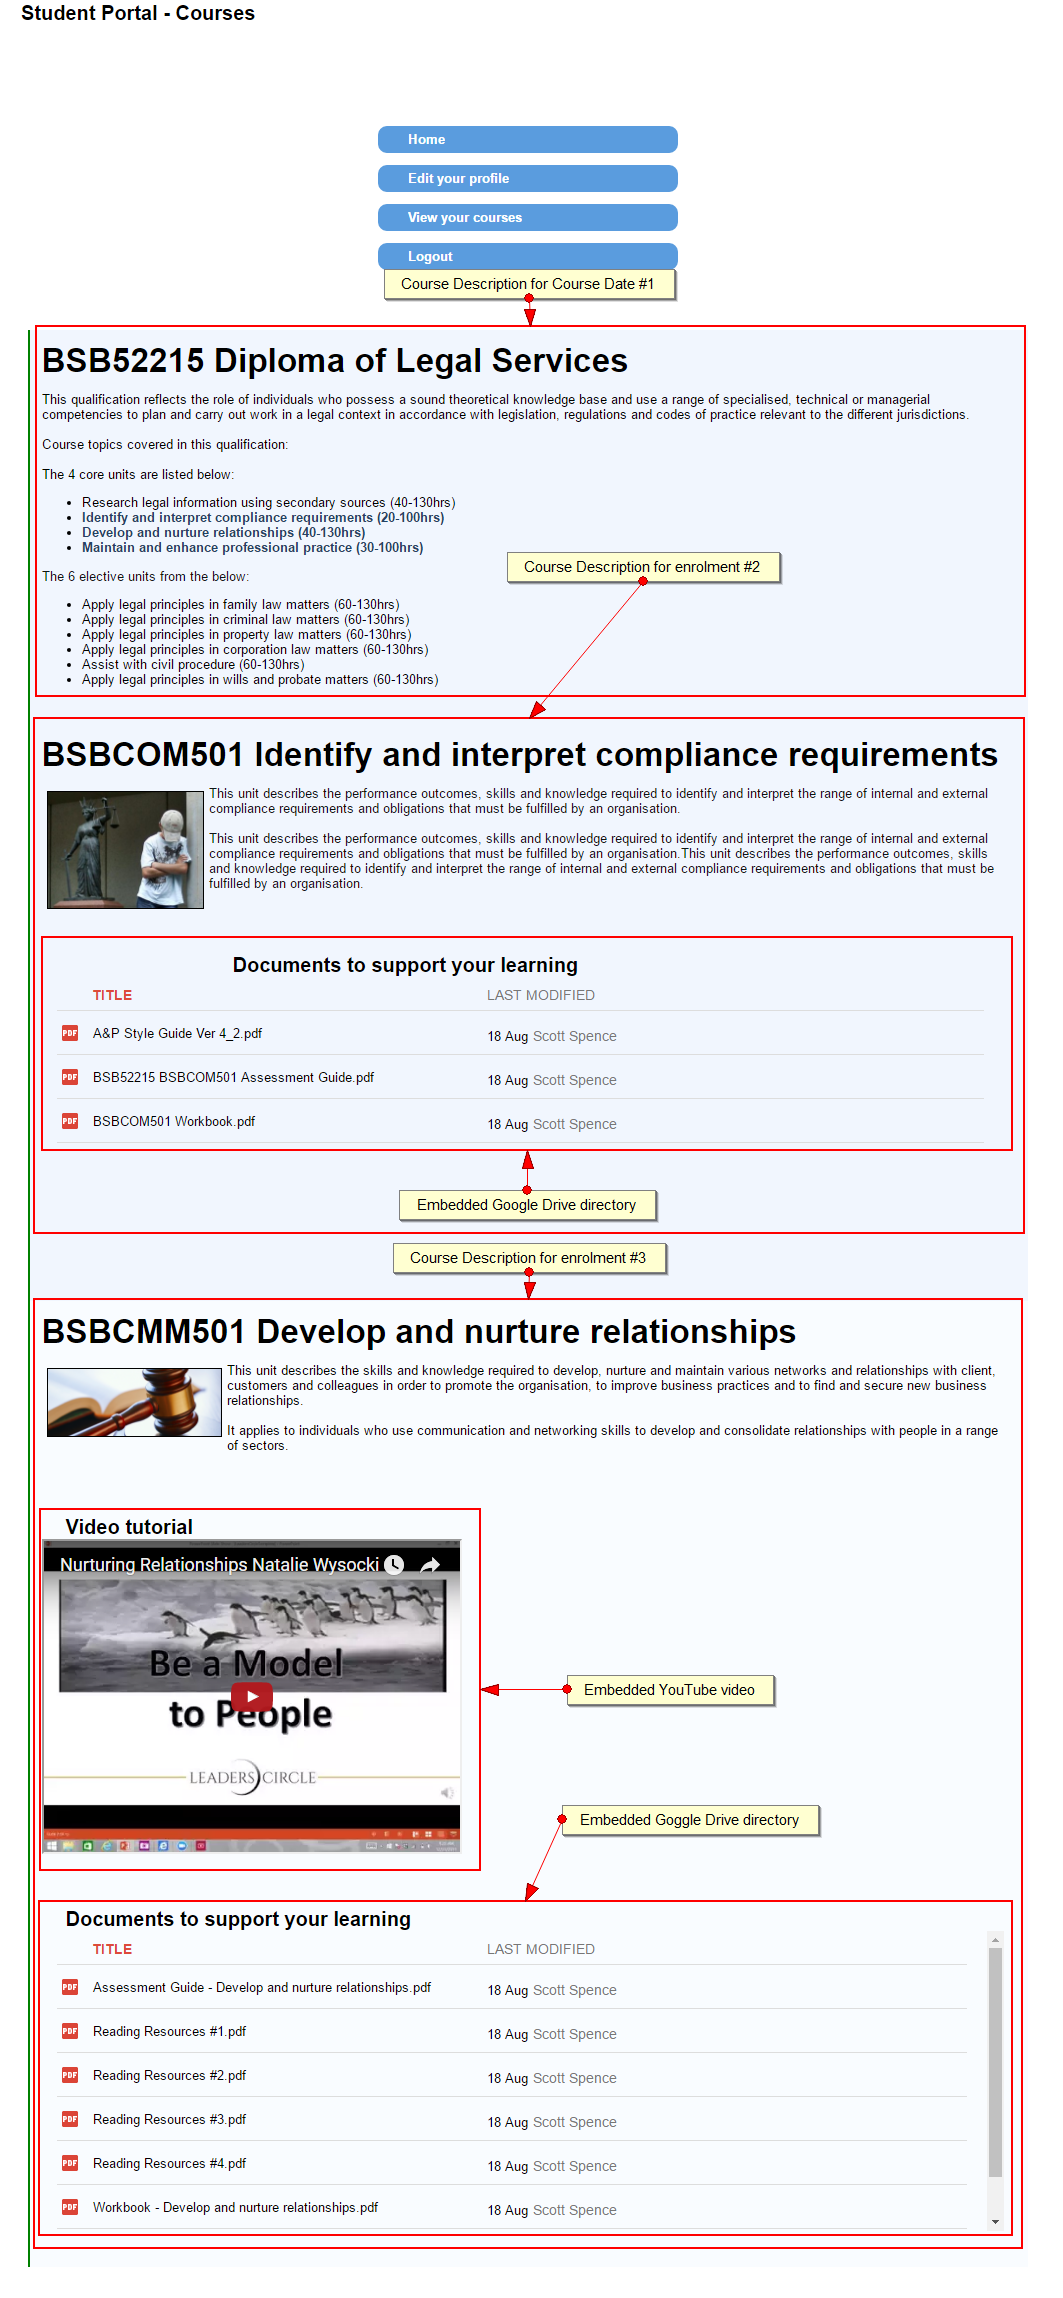
Including videos and Google Drive folders
To include Videos from YouTube use the ‘share’ menu below the video and select the embedded HTML, copy that into the course description at the desired location. To add the Google drive you need the folder id (found in the URL while visiting the drive folder) here is the HTML used for the above example, note the use of divs to arrange the two iframes and their headings:
<div style="display: left; width: 100%;">
  <div style="clear: both;">
    <h2>Video tutorial</h2>
    <br>
    <iframe style="display: left;" src="https://www.youtube.com/embed/BrAoirSAgrk" frameborder="10" width="420" height="315"></iframe>
  </div>
<div style="clear: both; width: 100%;">
  <h2>Documents to support your learning</h2>
    <br>
    <iframe style="width: 100%; height: 300px; border: 0; display: block;" src="https://drive.google.com/embeddedfolderview?id=0B3gpof1gqu3Pb1hqcVJtcEVh..."></iframe>
  </div>
</div>
Linking to content within the same page
When you want to link from a qualification to other courses you need to create ‘anchors’ in the text, then to ensure that the links don’t miss the heading you need to add some addition text to put the link X pixels above the actual link.
Code to include to create the anchor and position the link to be above the course category header (in this case the id is the anchor, the link location is 285 pixels above the code, to include the heading):
<span id="BSBCMM501" style="display: block; content: ' '; margin-top: -285px; height: 285px; visibility: hidden;"></span>
To link to this content include this code:
<a href="#BSBCMM501">Develop and nurture relationships (40-130hrs)</a>
Linking to the student portal
The student portal may require modification using the css and js files, you can include these in the link you provide to students like this:
https://[shortname].coursesales.com/studentportal?h=1&css=studentportal-elearning.css&js=studentportal-elearning.js
Customising the CSS and Javascript
The CSS customisations that you might like to use are:
/* Customizations for LMS */

/*Include Logo */
#header{
    background-image:url('/images/[shortname]/[shortname].jpg') !important;
}

  /*Remove any registrations that have been moved to a cancelled course: fix for enrollments that are cancelled but still show */

div.cdCancelled {
  display:none !important;
}

/*Remove option to see Section 1 content of the course description, if more content is necessary display section 1 only*/
span.crsDscMore{
    display:none !important;
}

/*Remove the date and location as this is an elearning course NOT a face to face course*/
div.crsDteSta,div.crsDteLocNme {
      display:none !important;
}

/*Make the course Category look more prominent */
div.crsCat {
    font-weight:bold !important;
    font-size:25pt !important;
}

/* Remove the check in and list of course topics buttons - this is an extra level that is not required in pure e-learning courses*/

div.docChkInUrl,div.docExtIdUrl {
   display:none !important;
}

/*hide the top Student Portal menu item of 'view your course calendar' as dates in a schedule are irrelevant for elearning */
#studentPortalMenuViewCalendar {
    display:none !important;
 }
The Javascript file customisations that you might like to use if you need more content than the ‘Brief’ content of a course description allows are as follows (If you use change the above CSS reference to crsDscLess) :
/*The following ensures that uploaded files are displayed by default */
$('span.crsDscMore').trigger('click');
Assessing student progress
With CourseSales.com you can receive student assignments and assess a student’s progress using quizzes. Students can upload their own assignments to their registration form using the Checkin function - which can then be viewed by trainers. The trainer can then update the unit of competency (Document topic) with the outcome for that student. Students can also be sent links to complete a quiz once they confirm they have complete the required work, or sending the quiz could be sent once the trainer approves the progress made to date. Making the request to complete the next unit of competency once the previous is completed automates the whole process.
Set up the assignment receiving function and the student portal.
-
Create upload field for the document form - displaying on a per course category basis if needed.
-
Modify ‘Check into your course’ button (perhaps add to the Units of competency details page).
-
Test that trainers can see the fields, and download then from the trainer portal.
Configure quiz - sent automatically
-
Set up emails on the ‘attending’ process step that get sent to the student
-
Ensure that the email to the student has the link to the quiz.
-
Set up success on the quiz to trigger an invitation to the next unit of competency.
Configure quiz - sent upon trainer request
-
Set up emails on the ‘attending’ process step that get sent to the trainer to request they mark the work, include link to approve quiz sending
-
Set up an extranet form for the trainer to use to request the quiz link is sent to the student
-
Ensure that the email to the student has the link to the quiz.
-
Set up success on the quiz to trigger an invitation to the next unit of competency.